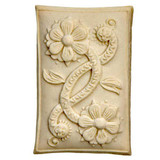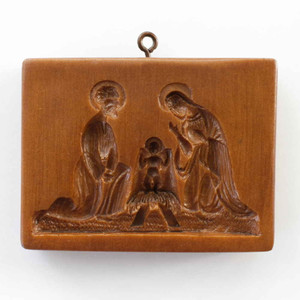
House on the Hill Floral Tapestry Springerle Mold
Dimensions: 7.25 x 3.25 inches
Model #M24021
House On The Hill cookie molds and rolling pins are made of a resin and wood composite. Each is individually cast and carefully finished by hand. Most of the designs are replicas of antique carvings that are now in museums and private collections. Since the original carvings have imperfections such as surface cracks and worm holes, our replicas mimic these characteristics. This adds a sense of authenticity and charm and makes them beautiful enough for display.
· Includes booklet with recipes that will retain the details of the mold.
· Components for manufacturing the molds are specially chosen for food safety.
· Use a soft bristled brush to clean flour after using.
· When needed, wash by hand, and never soak.
· Occasionally, on the first wash the ink that stamps the name (usually on the back) may partly wash off; just wash off the back and pat it dry with a paper towel.
Hand crafted and hand finished in the USA
Springerle Cookies
The traditional springerle is a leavened egg, flour and sugar cookie, flavored with anise, and imprinted with a picture from a mold. With origins in Germany around the 14th century, the molds, or "presses", were either carved from wood or made with clay. Springerle cookies told stories, celebrating births, weddings, holidays, and victories.
Connie’s House on the Hill
General Directions for Printing Cookies
Size and liquidity of eggs, flour, and weather can affect your dough. Use your senses to decide if the dough will print well without sticking. You may need to use less or more flour than the recipe states.
To prevent sticking:
Method #1: Brush confectioner’s sugar or flour (use flour for cookies and confectioner’s sugar for candy) over mold with a clean, dry pastry brush to prevent sticking.
Method #2: In some instances you may prefer to spray mold with non-stick spray or lightly coat with cooking oil (wiping with a paper towel); for example, to avoid a "floury" look on dark gingerbread. Do not grease and flour molds, as the combination will plug the details.
Printing cookies:
Method #1 – For most cookies roll the dough approximately 3/8" to 1/2" thick (deeper molds need thicker dough). Brush confectioner’s sugar or flour on the mold image, then imprint with your press (mold), cut out shape with knife, pastry wheel, or shaped cutter, dry and bake. If you press a cookie adjacent to another cookie, you may distort the first image, so remember to "press and cut, press and cut" as you go along.
Method #2 – For very deep or large cookies roll out dough to desired thickness and, using a dry, clean pastry brush, apply flour or sugar and cut a piece of dough the approximate size needed for the mold. Press dough into the mold with fingers, working from center outward. You may lightly roll the back side of the cookie to smooth before turning out the mold. Trim, dry and bake. To check your print, use light from the side – daylight or light from a floor lamp – so the shadows let you see if your prints are good.
Drying:
Most printed cookies are dried 2-24 hours before baking (depending on your schedule, humidity, etc.). Drying preserves the image during baking.
Baking:
Best bake one cookie of each size first! It saves grief!
Baking Temperatures:
Ovens vary widely! If your test cookie "over puffs" or tilts, reduce heat, put an empty cookie sheet on bottom oven shelf, or prop the oven door slightly ajar with handle of a wooden spoon to wick off heat. For tiny cookies, you may need the temperature as low as 200°F. In general, the smaller the cookie, the lower the temperature. The larger the cookie the higher the temperature
Bubbles:
Flat areas of larger cookies are vulnerable to "bubbles" while baking. Simply press them down manually and finish baking.
Hartshorn:
(Ammonium Carbonate or Baker’s Ammonia)
Hartshorn is an old-time leavening unexcelled for cookies and produces an especially light, delicate texture. Hartshorn can be substituted for baking powder proportionately one-to-one in cookie or cracker recipes. Do not use for cake or bread. Hartshorn is not affected by age, but will evaporate so keep it tightly sealed. Dough made with hartshorn stores well, as its leavening action is only triggered by heat, not moisture. There will be an ammonia smell during baking, but it will be baked out of your cookies. Do not eat raw cookie dough made with hartshorn.
Flavoring Oils:
Flavoring oils are more pure and more intense than extracts or flavorings. They are a super choice for your cookie baking. Don’t be alarmed if anise oil crystallizes or congeals; place the bottle in warm water until it is liquefied and shake.
Softening Cookies:
Should your cookies accidentally harden, put slices of apple on firm bread in with them for a day or more. Watch and change apple slices if needed to prevent mildew. m,
- Country of Origin:
- Made in USA


